
Sailpoint’s IdentityNow REST APIs - Part 1

I have decided to create a series of blog post related to identity and access management especially using Sailpoint IdentityNow. Most of you guys knows that IdentityNow is a SaaS based Identity and Access Management solution from Sailpoint. The primary focus of this series would cover development, automation, Administration’s aspects of IdentityNow. Also, I believe this will be helpful for those who are interested in learning/ moving to IdentityNow solutions.
Important
This series assumes that you already have some basic knowledge around identity concepts, REST API & Integration, and Sailpoint IdentityNow Services.
Prerequisites
In this post I am going to demonstrate how we can use Personal Access Token (PAT) as an authentication mechanism to get the authorization token which then will be used to consume different REST API service available within IdentityNow.
Sailpoint recommends using Personal Access Tokens since Password Grant type will be deprecated for use by all API clients soon.
First, we need to generate Personal Access Tokens via IdentityNow Portal and I have followed the steps below:
• Select Preferences from the drop-down menu under your username.
• Personal Access Tokens on the left pane
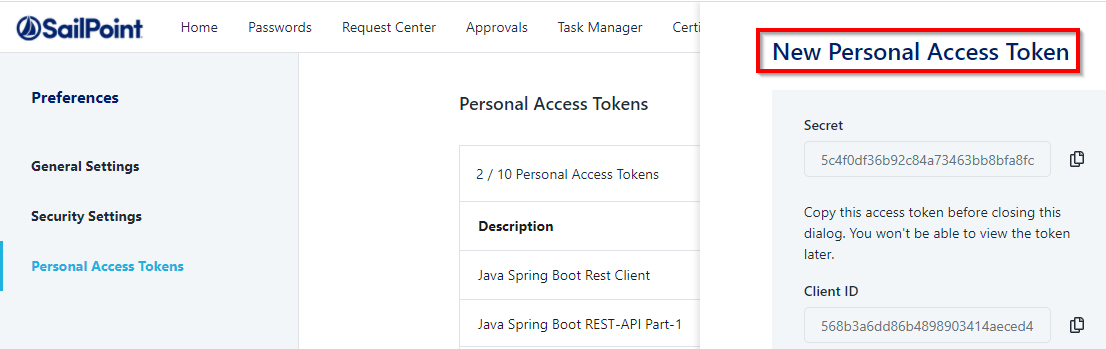
• Click Create Token to generate => Now you will be able to see two artifacts the Secret and the Client ID
• Copy both values and keep it in safe place. I’d recommend keeping these values in safe place like CyberArk Vault or password management tools.
The below screenshot depicts a sample Personal Access Tokens created through an IdentityNow portal
I always prefers to validate the PAT through Postman to make sure the generated tokens are connecting to IdentityNow services and retrieving the access tokens as expected.
The below screenshot represents Postman connection configurations and the successful access Tokens.

Setup
Make sure your workstation/ Laptop installed with the below tools for this simple exercise.
• JDK 1.8 or more
• Eclipse (IDE for java & Spring boot)
• Maven (Build tool)
I’ve created a simple Spring-Boot project (IdentityNow-ListIdentities) in Eclipse IDE and the project structure is as follows:
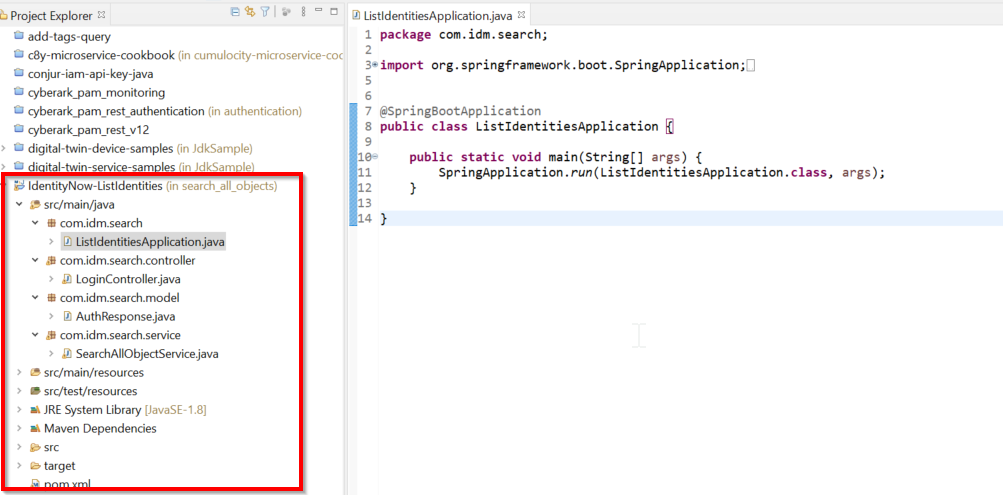
The main class resides in the ListIdentitiesApplication.java and it will be a starting point for this spring boot project.
package com.idm.search;

import org.springframework.boot.SpringApplication;
import org.springframework.boot.autoconfigure.SpringBootApplication;

@SpringBootApplication
public class ListIdentitiesApplication {
	public static void main(String[] args) {
		SpringApplication.run(ListIdentitiesApplication.class, args);
	}
}
The AuthResponse.java is a simple POJO class which is nothing but a model class in the MVC framework.Im using lombok framework to convert the response to a POJO for easy retrival of the attributes.
package com.idm.search.model;
import lombok.Getter;
import lombok.Setter;
@Getter
@Setter
public class AuthResponse {
	private String access_token;
	private String token_type;
	private String expires_in;
	private String scope;
	private String tenant_id;
	private String pod;
	private String strong_auth_supported;
	private String org;
	private String identity_id;
	private String user_name;
	private String strong_auth;
	private String jti;
}
Another important class is called as LoginController.java which will be exposing a local endpoint (http://localhost:8080/searchAllObjects), which will invoke the servcie class.
package com.idm.search.controller;
import java.io.IOException;
import org.springframework.beans.factory.annotation.Autowired;
import org.springframework.http.ResponseEntity;
import org.springframework.stereotype.Controller;
import org.springframework.web.bind.annotation.RequestMapping;
import com.idm.search.service.SearchAllObjectService;

@Controller
public class LoginController {
 private final SearchAllObjectService searchAllObjectService;

	@Autowired
	LoginController(final SearchAllObjectService searchAllObjectService){
	this.searchAllObjectService= searchAllObjectService;
	}
	@RequestMapping("/searchAllObjects")
	public ResponseEntity<String> searchAllObjects() throws Exception {
		return searchAllObjectService.searchAllObjects();
	}
}
I have a service class named SearchAllObjectService.java which will br used here to handle the actual business logic related to the Request and Response.
package com.idm.search.service;
import java.io.IOException;
import java.net.URI;
import java.nio.charset.Charset;
import java.nio.charset.StandardCharsets;
import java.util.Collections;
import java.nio.charset.StandardCharsets;
import java.util.Base64;

import org.springframework.beans.factory.annotation.Autowired;
import org.springframework.beans.factory.annotation.Value;
import org.springframework.http.HttpEntity;
import org.springframework.http.HttpHeaders;
import org.springframework.http.HttpMethod;
import org.springframework.http.MediaType;
import org.springframework.http.ResponseEntity;
import org.springframework.stereotype.Service;
import org.springframework.util.LinkedMultiValueMap;
import org.springframework.util.MultiValueMap;
import org.springframework.web.client.RestTemplate;
import org.springframework.web.util.UriComponentsBuilder;

import com.fasterxml.jackson.databind.JsonNode;
import com.fasterxml.jackson.databind.ObjectMapper;
import com.idm.search.model.AuthResponse;
import com.idm.search.util.CredentialsResolver;

@Service
public class SearchAllObjectService {


	public ResponseEntity<String> searchAllObjects() throws IOException
	{
		RestTemplate restTemplate = new RestTemplate();

	  String clientID="bfb6f4083542440e8b11841a24d96d8d";
	  String clientSecret="977ebfa7ce6fce23eebd5f40d2de84908d8fb2c1694808745870afb3859ab376";
	  String url="https://apac-partner02.api.identitynow.com/oauth/token";

	  HttpHeaders headers = new HttpHeaders();
	  headers.add("Content-Type", MediaType.APPLICATION_FORM_URLENCODED.toString());
	  headers.add("Accept", MediaType.APPLICATION_JSON.toString()); //Optional in case server sends back JSON data

	  MultiValueMap<String, String> requestBody = new LinkedMultiValueMap<String, String>();
	  requestBody.add("grant_type", "client_credentials");
	  requestBody.add("client_id", clientID);
	  requestBody.add("client_secret", clientSecret);

  	HttpEntity formEntity = new HttpEntity<MultiValueMap<String, String>>(requestBody, headers);

  	ResponseEntity<String> response = restTemplate.exchange(url, HttpMethod.POST, formEntity, String.class);
	  ResponseEntity<String> response1 = null;

	  System.out.println("Rest Response ");
	  System.out.println(response.getStatusCodeValue());
    ObjectMapper mapper = new ObjectMapper();
    AuthResponse node = mapper.readValue(response.getBody(), AuthResponse.class);
    System.out.println("Access Token \n"+node.getAccess_token());

    String authToken1 = node.getAccess_token();
    HttpHeaders headers1 = new HttpHeaders();
    headers1.setAccept(Collections.singletonList(MediaType.APPLICATION_JSON));
    headers1.add("User-Agent", "Spring's RestTemplate" );  // value can be whatever
    headers1.add("Authorization", "Bearer "+authToken1);
    String url_identity="https://apac-partner02.api.identitynow.com/v2/identities";

    HttpEntity<String> request = new HttpEntity<String>(headers1);

    response1 = restTemplate.exchange(url_identity, HttpMethod.GET, request, String.class);
    System.out.println("\nList of Identities  \n" + response1.getBody());

 	return response1;
}
}
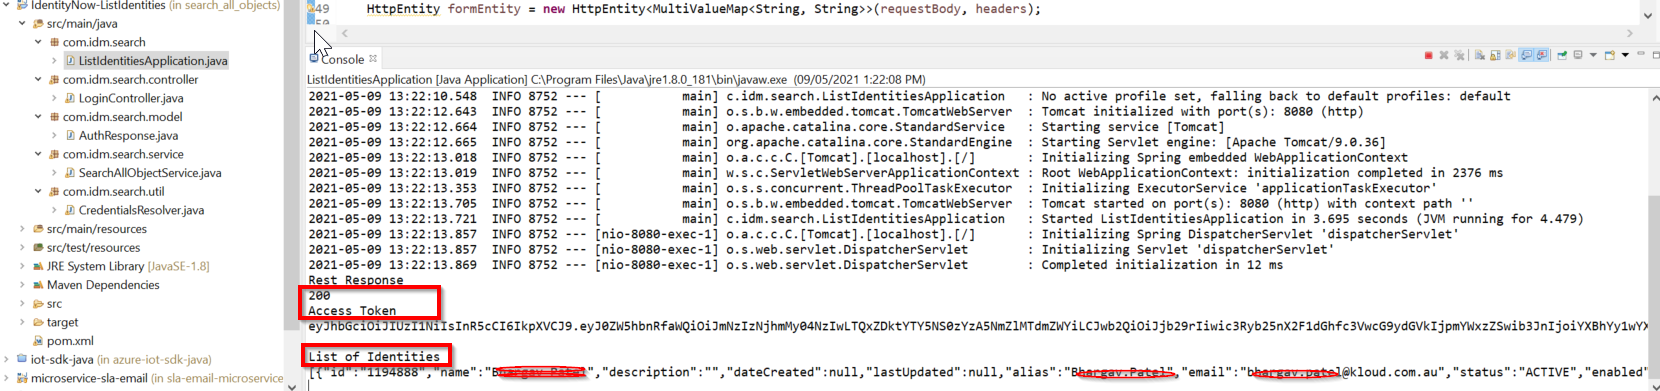
For simplicity the REST service is invoked via browser and you can also use Postman too to invoke the same.

If there is no error you will get the authorization token first then it will be passed on to v2/identities endpoint which will return all the Identities on the IdentityNow tenant.
The entire project is at the github and you can access them at Nirmal’s GitHub repo. For any further queries. please reach out to me.
Summary
As of today, I have not come across any Java based Spring-Boot examples for IdentityNow REST API calls. It is recommended to follow steps and setup your project accordingly. You can use this project as a template and you can develop according to your own requirements. In the subsequent post, I am planning to cover more complex scenarios.
Stay tuned!!